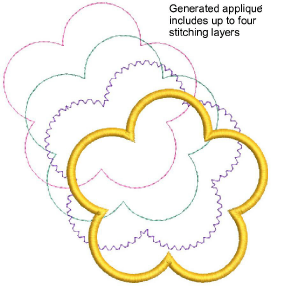
Use the Appliqué tools to produce all the stitching you require for appliqué objects. Up to four layers of stitching – placement lines, cutting lines, tack stitches and cover stitches – can be generated. When you stitch out an appliqué object, the machine stops between layers. You can also set a frame-out position which shifts the hoop from under the needle, making it easier to place and trim appliqué patches. The object below has been broken apart to show four layers of stitching...
When you stitch out an appliqué object, the machine stops between layers. The table below summarizes each...
Element |
Purpose |
These are the first appliqué layer to be stitched. Optionally, they are used to position pre-cut appliqué patches on the background material. |
|
Cutting lines form a guide for trimming the fabric of an appliqué patch when using the ‘Trim-in-place’ style. |
|
This is a zigzag or other stitch type placed after placement and cutting lines. It is to fix appliqué patches to the background fabric before cover stitching is applied. |
|
Cover stitch is the border around an appliqué shape. You can control various settings including cover stitch type – Satin, Blanket, Zigzag, Run, or None. |
|
By default, a ‘frame out’ is automatically set to ‘Place under cover stitches’. During stitchout, it causes the hoop to shift out from beneath the needle, making it easier to place and trim appliqué shapes. |
Add-ons
Get started & learn faster with...


