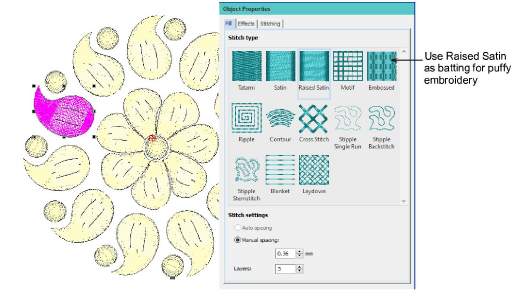
Use Object Properties > Outline > Raised Satin to create raised satin borders – can be used with trapunto for quilting effects.
Use Object Properties > Fill > Raised Satin to create raised surfaces – can be applied to lettering or used with trapunto for quilting effects.
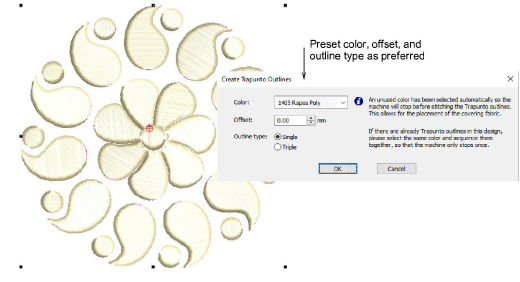
Use Create Layouts > Create Trapunto Outlines to use in conjunction with Raised Satin to create stitching for a raised ‘quilted’ look.
Traditionally, quilted embroidery creates dimension by stuffing or filling areas to produce a raised surface. It employs a technique known as ‘trapunto’. A similar effect can be achieved using two software tools:
Raised satin: This allows you to create ‘puffy embroidery’ as an alternative to stuffing with yarn or batting.
Trapunto outlines: The trapunto component allows you to stitch layers of fabric over top.
The embroidery design, consisting of multiple layers of satin stitching, is first stitched onto Aqua Mesh water-soluble stabilizer. Then a top and bottom layer of fabric are added before the final outline is stitched around the design. Recommended settings for best loft are 0.36mm manual for satin spacing with 3 layers.
To create trapunto embroidery...
1Digitize the design using Raised Satin.
2Select all objects you want to include and open Create Trapunto Outlines.
3Use the Create Trapunto Outlines tool to create trapunto outlines. Preset color, offset, and outline type as preferred.
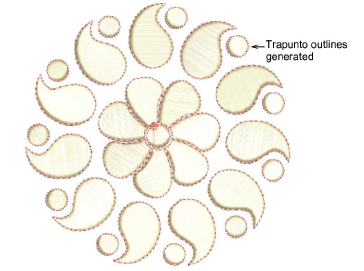
4Click OK to generate trapunto stitching.
Tips
Stitch the design on a backing fabric or heavy cutaway stabilizer.
Next, cover the design with the main fabric and stitch the trapunto outline.
Trim the stabilizer or backing close to the design stitching on the back.
Study the quilting design included in the designs folder. Try stitching it out to practice the techniques involved. Check your machine documentation.