Use Create Layouts > Create Outlines & Offsets to create outlines and offsets for selected embroidery object(s).
|
|
Use Create Layouts > Create Outlines & Offsets to create outlines and offsets for selected embroidery object(s). |
The Outlines & Offsets feature allows you to create offset outlines around selected objects or entire designs with a variety of outline styles.
1Select the source object/s if not already selected.
2Click the Outlines & Offsets icon. The dialog opens. This dialog allows you to add offsets in a single process.
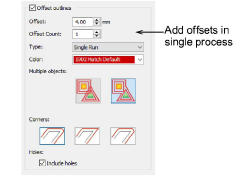
3Tick Offset outlines.
4Select color and stitch type as for object outlines.
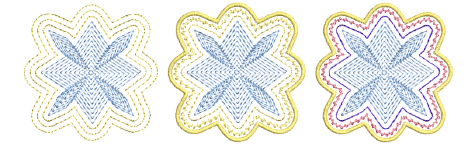
5In the Offset Count field, enter the number of offset objects required, and enter an offset in millimeters. When you set multiple borders, the offset you specify is calculated from the previous border. The offset determines spacing between all borders.
6Choose an offset option:
|
Offset type |
Notes |
|
|
|
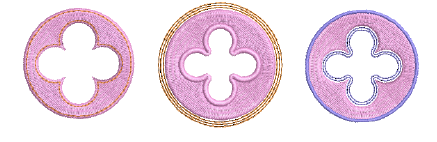
Individual |
All generated offsets are full outlines. |
|
|
Common |
Intersecting offsets are combined into a single outline. |
7Click OK to apply. Hatch Embroidery generates offset objects and adds them to the end of the stitching sequence.

Generated offsets are independent objects and can be further modified as desired.
Include holes as preferred.
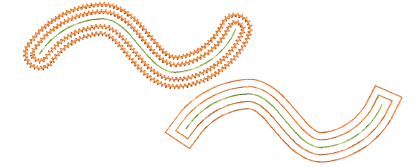
You can use the Outlines & Offsets tool with open objects to create closed offsets as shown. Select rounded or squared corners as preferred.
Add-ons
Get started & learn faster with...