Center hoops
By default Hatch Embroidery will open your design in the hoop position it was last saved with. If you are creating a single hooping, it’s a good idea to turn on automatic centering to check that the design will fit within the selected hoop. You can, however, use the fixed option to lock the hoop position. This means it won’t automatically center while you are digitizing.
To set the hoop center...
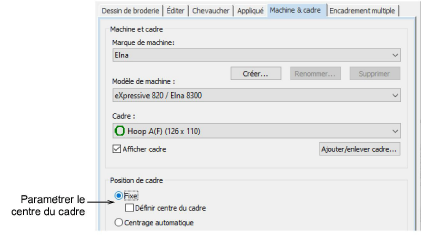
Click the Machine & Hoop Options button to access machine and hoop settings. Or right-click the Show Hoop icon.
The Hoop position panel gives you these options:
|
Option
|
Purpose
|
|
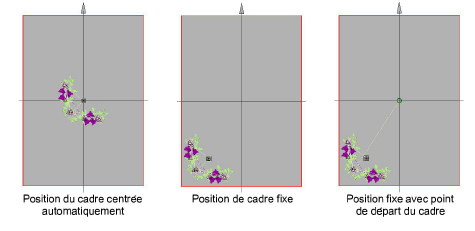
Fixed
|
Allows manual placement of the design anywhere in the hoop. Only suitable for machines which allow off-centering of designs within the hoop.
|
|
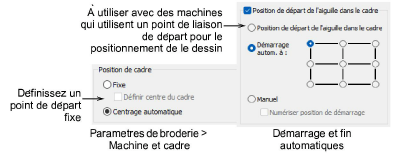
Set hoop center
|
Allows an arbitrary hoop center to be created by digitizing a point in the fenêtre dessin. If you select this option, click a point in the fenêtre dessin where you want to center the hoop.
|
|
Automatic centering
|
The hoop always centers itself around the design center.
|
Usage tips
-
Some embroidery machines will always center the design. Set your software to match the exact behavior of the machine.
-
The Fixed hoop position can be used in conjunction with the Start needle position in hoop option for machines that use the start connector to position the design.
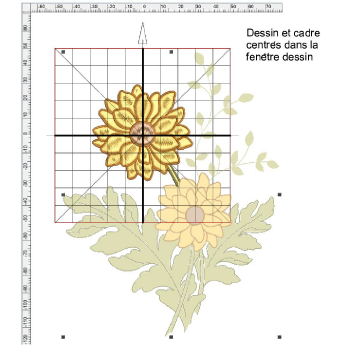
Note: The Center All command effectively moves the entire design such that the embroidery is centered at 0,0. If, for instance, we digitize only one of the flowers in the above image and then click Center All, the flower alone is centered around 0,0, not the artwork.
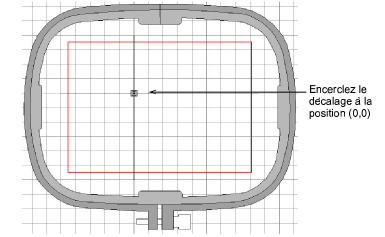
-
Some hoops such as the Janome No. 1 & 3 (126 x 90) are offset at the (0,0) position. If you apply Center All, these hoops are automatically centered at the(0,0) position. You can still use it if the design is centered in the embroidery field. The start connector still goes to the center of the hoop rather than the center of the design.
Related topics