
Use Edit Objects / Select > Reshape to reshape an object outline, edit stitch angles, or adjust entry and exit points.
|
|
Use Edit Objects / Select > Reshape to reshape an object outline, edit stitch angles, or adjust entry and exit points. |
You can change stitch entry and exit points of individual objects. Do this to place the exit point next to adjoining objects for smaller connecting stitches, or to reduce the number of travel runs. Select the entry or exit point as required, and drag it to a different position on the object outline. The cross represents the end point.
Select the object and click Reshape. Reshape nodes appear, including entry and exit points.
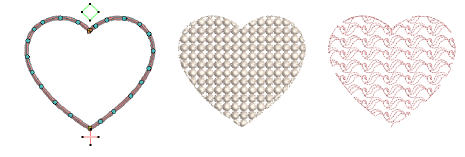
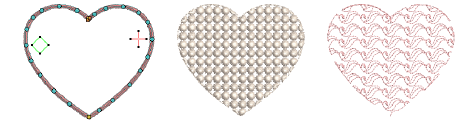
Select the entry or exit point as required, and drag it to a different position on the object outline. To minimize gaps in your embroidery, place entry and exit points opposite each other on the outside boundary.
Press Enter to apply the changes, then Esc to finish.
It’s a good idea to define the stitch angle so it is perpendicular to the line between entry and exit points.
Tip: By default, objects are joined by the Closest Join method. If deactivated, all newly digitized objects are joined by the As Digitized method. Press Enter to accept default entry and exit points, or follow the prompts in the Prompt Bar to manually digitize them. Voir également Paramètres de dessin.
Modules complémentaires
Commencez et apprenez plus vite avec...


