
Use Auto-Digitize > Auto-Digitize Embroidery to automatically digitize embroidery designs from imported artwork, vector or bitmap, with user-defined presets.
|
|
Use Auto-Digitize > Auto-Digitize Embroidery to automatically digitize embroidery designs from imported artwork, vector or bitmap, with user-defined presets. |
For more control over object conversion, use the Auto-Digitize Embroidery method. This can recognize shapes in artwork and allow you to choose suitable stitch types for conversion. The tool handles both bitmap and vector formats.
1Scan or insert the artwork you want to use. Pour plus amples informations, voir Assign threads for auto-digitizing.
2Select the image and click Auto-Digitize Embroidery. If you have not yet prepared the image, you will be prompted to do so.
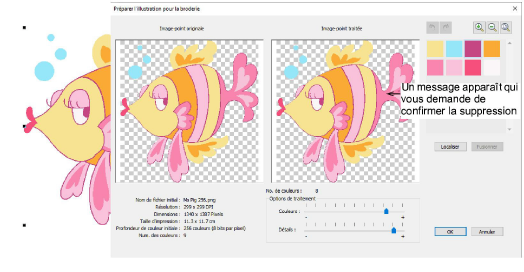
3Make any further adjustments necessary and click OK. Pour plus amples informations, voir Prepare artwork for auto-digitizing.
Hatch Embroidery will attempt to classify image colors as fills or details. Details may take the form of outlines or ‘pickout runs’, such as the eyelashes in the artwork shown here.
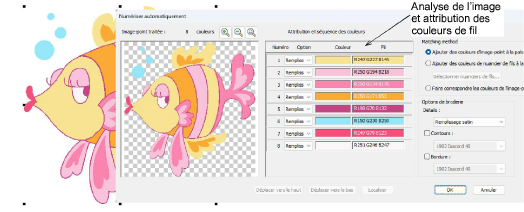
Tip: The artwork may include outlines as part of the image. However, the software itself can generate outlines around color blocks in the design.
4Select a color in the list and use the Locate button to preview.
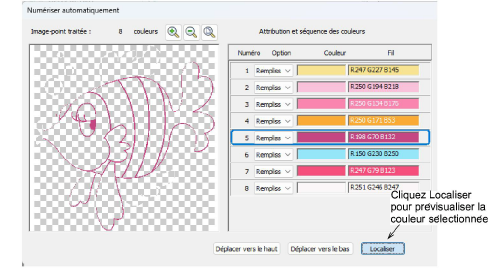
5Having located the colors, decide if you want to change the software defaults. You can treat colors as fills or details, or omit them altogether.
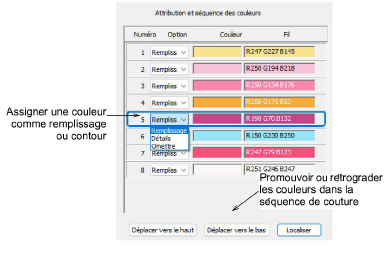
6Use the ‘Move’ buttons to re-sort the color sequence as preferred. Fills should be stitched first, details last.
1Select a conversion method for color matching:

You have three options:
Add bitmap colors directly to the design palette (recommended).
Choose a chart and match bitmap colors to actual threads. Click the Select Thread Charts button to access thread charts.
Or, match bitmap colors to the nearest colors in the design palette.
2Select stitching options for handling details, outlines, and borders:
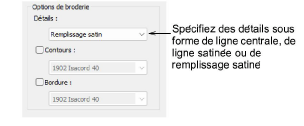
You have three options:
|
Option |
Purpose |
|
Details |
Handle details as a centerline, satin line, or a satin fill. Select an option from the droplist. |
|
Outlines |
Add outlines to all detected color blocks. Tick Outlines and select a thread color from the droplist. |
|
Border |
Add a satin border to the entire design. Again, pick a color from the droplist. |
See examples below.
Click OK to process the image.
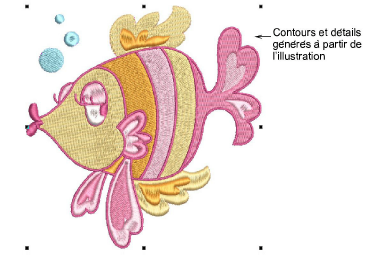
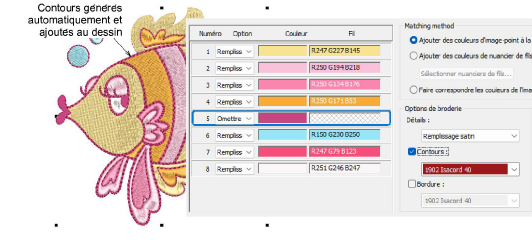
The artwork here includes its own outlines. An alternative method is to allow the software to generate outlines. The Outlines option reinforces all color blocks with continuous, branched running stitches. Here we omit the artwork outlines and details, and turn on Outlines stitching option.
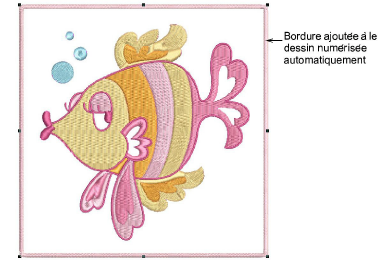
Additionally, you can generate a border around the entire design with Border stitching option.
Editing techniques are available to further refine the auto-digitized image. The editing capabilities may be limited depending on the level of Hatch Embroidery you own.
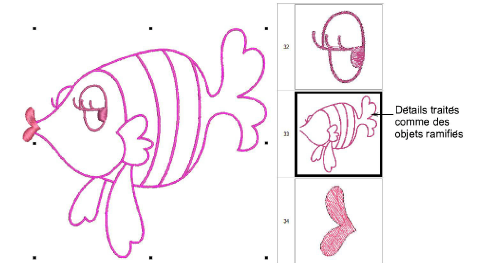
Note: Details created from auto-digitizing are treated as branched objects. If you want to change stitch type to, say, Satin, Raised Satin, Zigzag or Blanket, the object needs to be unbranched before these stitch types can be applied.