As an intermediate user, you may want to create design layouts on large work-pieces. Each design will fit in a single hoop but there may be multiple designs in the piece. Each hooping has its own reference point that is used with the hoop template to accurately place the design at the correct orientation. As there is only one design per hooping, there is no need for secondary placement points. The main benefit of this technique is that all components can be accommodated within a single design file.
1Insert or open a design. The hoop automatically centers around design extents, as it does on most machines.
2Optionally, adjust design size or change the hoop to suit the design.
3Create a design layout by combining designs and design elements.
There are various features within Hatch Embroidery for quickly creating geometric design layouts – Mirror-Merge, Layouts, etc.
Alternatively, place designs manually.
Optionally, include a background for a garment or large work-piece.
4Use multi-hooping in order to automatically place hoops for each design location. You can use the automatic feature to generate hoopings even in large layouts.
5Print the layout template with the design worksheet. Large layouts can be printed on small format printers and then pieced together. This establishes all hoops in the correct spatial relationship.
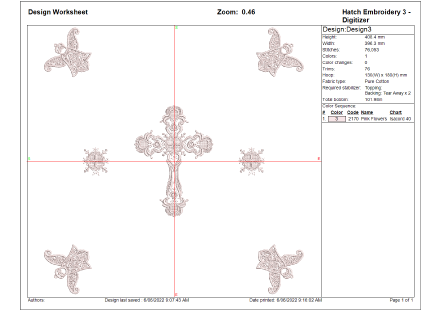
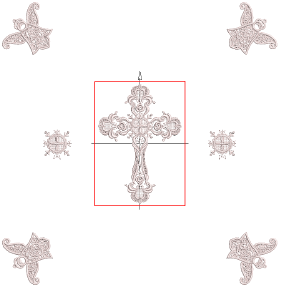
6Piece together the design worksheet to show the entire layout. The worksheet shows the hoop position marker. Each hoop position marker has a number indicating the hooping sequence.
7Send the design to machine. The design is automatically centered on the machine.
8Fix the layout template to the work-piece. Optionally, remove the non-stitched sections of the design worksheet to make the work-piece easier to work with.
9Hoop the work-piece using the printed layout template and hoop template. Align the worksheet hoop position marker with the hoop template centerlines.
10Once hooped, remove the layout template and stitch the design component for that hooping.
The hoop location number is included on the hoop position marker.
When sent to machine, designs have the hoop location number added to the design layout file name.
11Stitch out the design.
12Locate the next hoop in the sequence and repeat.
With work-piece layouts, you don’t need to include registration marks, but you do need the hoop position markers for each hoop location. This will show the position and orientation of each design in the layout.
Turn on hoop position marker via Print Preview > Options.
Add-ons
Get started & learn faster with...


