
Manual continuous embroidery consists of the following elements:
Single design in file.
Manually inserted basting stitch markers or graphic markers at start and end of design for alignment.
Manually repeated design on the machine using manual reference points to align each hooping.
1Insert or open a design.
2Move the design into the required position in the hoop. Start and end connectors are fixed to the center of the hoop.
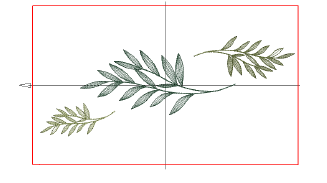
3Optionally, adjust design size or change the hoop to suit the design.
4Use the Basting Stitch Marker command to insert basting stitch markers – two near the top at either side of the design, and two near the bottom.
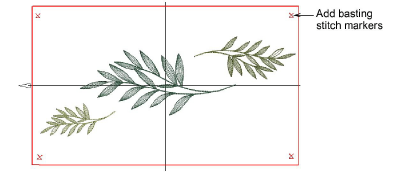
5Align the associated basting stitch marker with the bottom left-hand corner of the design extents:
Select the bottom left-hand basting stitch marker.
Using the Ctrl key, select the design.
Click Arrange > Align > Bottom followed by Arrange > Align > Left.
6Repeat for each of the other basting stitch markers to place them in each corner.
7Select the two basting stitch markers at the top. Using the Sequence docker, move them to the start of the design. Make sure the two bottom-most basting stitch markers are sequenced at the end of the design.
8Print a design worksheet showing the hoop position marker. Each marker has a number indicating the hooping sequence.
9Send the design to machine. The design is positioned at the same location as shown on screen. It uses start and end connectors to locate the design at the center of the hoop. The machine will start stitching at the hoop center.
10Fix the design worksheet to the fabric in the required position for the first part of the endless embroidery.
11Hoop the fabric. Align the worksheet hoop position marker with the hoop template centerlines.
12Step past the first two basting stitch markers as these are only needed for second and subsequent designs. Stitch out the design.
13Hoop a piece of sticky-back stabilizer for the second hooping.
14Stitch the first two basting stitch markers on the stabilizer.
15Place the fabric on the sticky stabilizer lining up the basting stitch markers on the fabric with those stitched on the stabilizer. Press the fabric into place.
16Stitch the next repeat of the design.
17Repeat the process until all repeats are complete.
Tip: Inserting graphics for the physical reference points could be substituted for basting stitch markers. These can be aligned to the design center, and the design and reference point rotated as needed.
Add-ons
Get started & learn faster with...


