Digitize shapes
Different digitizing tools are suited to different shapes or design elements such as fills, outlines, details. Shapes may be closed or open. If closed, stitching may be comprised of fills or outlines. When you select a tool, different stitch types become available. The Context toolbar also changes to modify what can be done. The input method for all digitizing tools is basically the same.
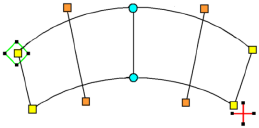
Control points
The reference points you mark when digitizing a shape become its ‘control points’. These vary slightly with object type. Most points can be added, deleted, or moved. Corner and curve points can be interchanged via the Spacebar. Some control points such as entry and exit points cannot be deleted but they can be moved.
|
|

|
Entry point
|
|

|
Exit point
|
|

|
Corner reshape node
|
|

|
Curve reshape node
|
|

|
Stitch angle points
|
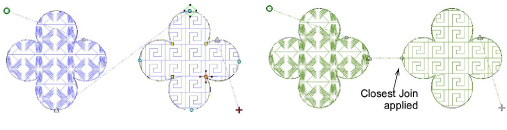
Join method
When you are digitizing closed objects, the Closest Join method automatically calculates connectors. See the second example below.
This method can be toggled off via the Embroidery Settings > Design tab from the Software Settings menu.
Related topics