Use Lettering / Monogramming > Lettering to create embroidery lettering using embroidery alphabets, Keyboard Design Collections or TrueType fonts, or edit selected lettering.
Use Edit Objects / Select > Reshape to reshape an object outline, edit stitch angles, or adjust entry and exit points.
In addition to the dedicated Monogramming feature, Hatch Embroidery allows you to create monogramming designs using special monogram fonts. For best results, bear in mind the following...
Monogram fonts may have two or three sets of each letter – left side, middle (optional), and right side.
When selecting letters, you need to ensure letter orientation is correct.
Some borders in a monogram font are designed for 3-letter monograms, others for 2-letter monograms.
Note: These special fonts are found and used with the Lettering tool rather than the Monogramming tool.
To add monogram lettering...
1Right-click the Lettering tool.
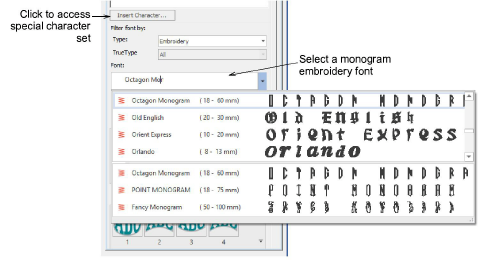
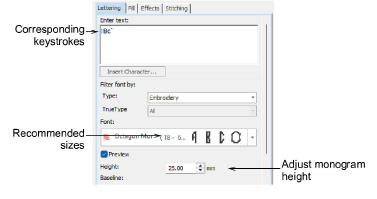
2Select a suitable monogram font such as Octagon Monogram from the Font list.
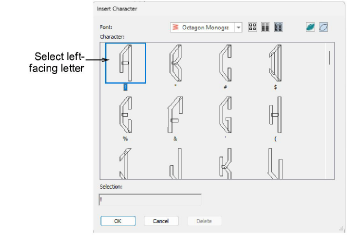
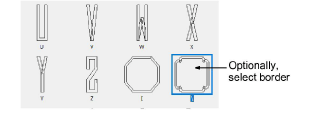
3Use the Insert Character dialog to choose the letters and ornaments you want to use. Octagon Monogram, for example, has three sets of each letter, one for the left side, one for the middle and one for the right side.
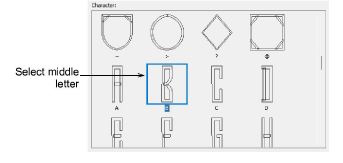
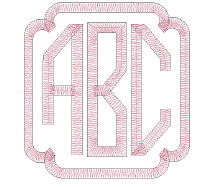
4Start with a left-facing letter and then a middle letter.
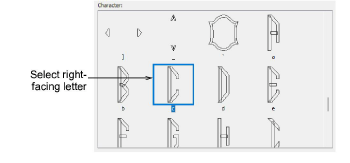
5Finish with a right-facing letter.
6Add a border as required. Choose the border which best suits your monogram – i.e. whether using 2 or 3 characters.
7Click OK.
8Adjust monogram height according to placement requirements. Use the recommended sizes as a reference.
Tips
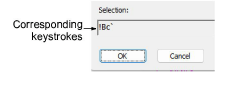
When selecting a character, a keystroke appears in the Selection field. This indicates the key combination required to type the character directly on-screen.
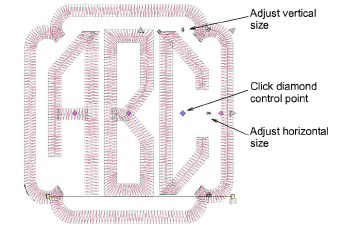
Use Reshape mode to adjust letter and border spacing.
Diamond points control the size or spacing of individual characters, including borders. Select the diamond point and drag to adjust position.
Use the other control points to adjust individual sizing.
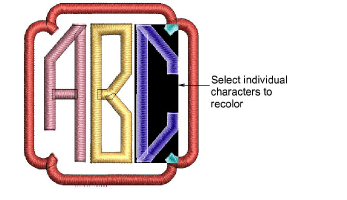
If you want the letters in your monogram to be different colors, select the object and click the Lettering tool. Then you can select and recolor letters one-by-one.
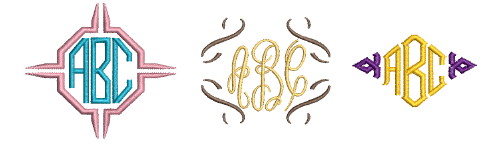
Experiment with different fonts and borders to find the combinations which work best for you.