Use Edit Objects > Multi Blend to generate color blends, perspective effects and shading in selected objects.
Use Edit Objects / Select > Reshape to reshape an object outline, edit stitch angles, or adjust entry and exit points.
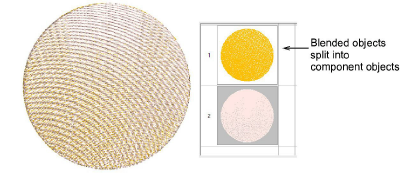
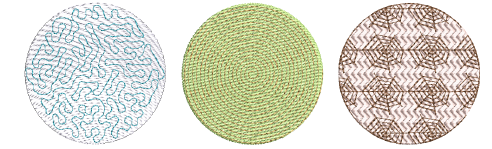
Use Edit Objects > Break Apart to split blended objects into components. Each can be edited individually.
Unlike earlier blending tools that required breaking objects apart for editing, Multi Blend allows you to manage every layer as part of a unified, compound object. Each layer can be adjusted individually, reordered, or restyled without compromising object integrity. Objects with blended stitching can be resized, rotated and skewed without losing the blending effect.
To edit stitch blends...
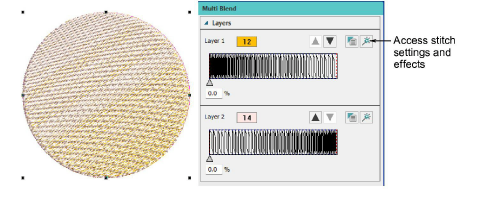
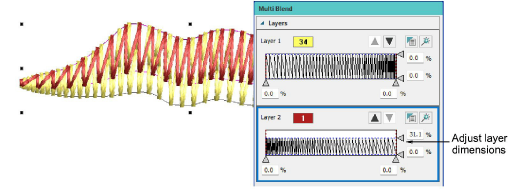
1Select the blended object and double-click to open the Multi Blend docker.
2Open Object Properties > Fills or Object Properties > Effects to adjust stitch settings or gradient fill profiles as preferred.
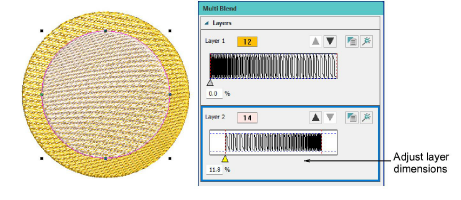
3Adjust layer dimensions with the slider controls.
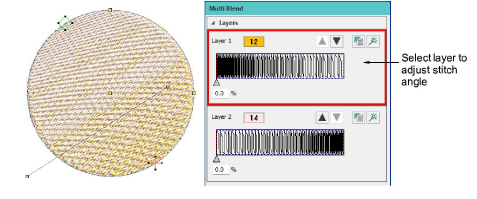
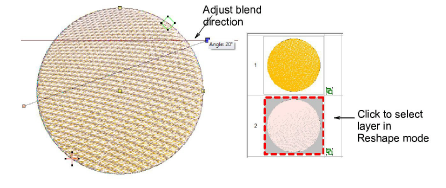
4Click the Reshape icon. The first layer is selected by default.
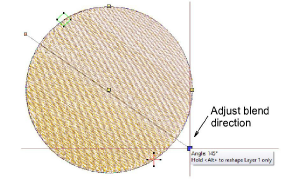
5Adjust blend direction using the stitch angle control.
6Adjust the second layer similarly by selecting it in the Multi Blend docker or Sequence toolbar. Generally you will want to use the same angle but you can mix and match. Experiment to find a ‘sweet spot’ that works best.
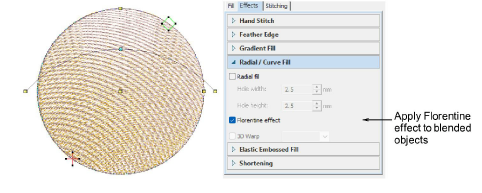
7You can even apply Florentine effect to blended objects. Use the Reshape tool to change the shape of the curve for the whole or selected layers.
8Study the blended object in the Sequence docker. It is selectable as a single compound object. Use Break Apart to access the layers as separate objects.
Usage tips
Turn off Auto Underlay to avoid unwanted underlying stitches.
Objects created with the Digitize Blocks tool offer additional editing possibilities in the Multi Blend docker. Layer dimensions can be adjusted in both horizontal and vertical directions.
Combine different fill types, using the same or contrasting colors, to create complex tonal transitions or texture variations.