The Freehand Embroidery tools have a special cursor. This is designed to provide a spacing guide as you use the tools.
1Use Show Guide to toggle the digitizing guide. This provides more control over ‘freehand’ drawing than the default pointer.
2Use the Guide Inner Circle Radius to set the size of the center circle.
3Use Number of Guide Circles to set the number of circles.
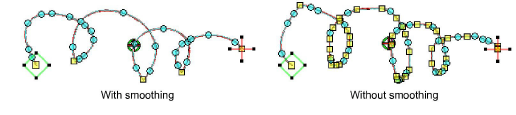
4Adjust the smoothness of freehand lines by means of the Smoothing control. Specify, as a percentage, how closely smoothed outlines follow the original.
Study your design and break it into sections to ‘sketch’.
Set smoothing to ‘90%’, guide to ‘1.0’, and number of guide circles to ‘1’.
Set zoom to ‘600%’. Then back down till you find your comfort zone. This will give you the most control if you are trying to use a mouse.
Use the smoothing control when finished digitizing each section.
View and edit the control points generated by Freehand Embroidery tools in Reshape mode.
For best stitching results, apply branching to completed sections, not the whole design.
Add-ons
Get started & learn faster with...