Use Edit Objects > Apply Closest Join to join selected objects at the closest point. Re-apply closest join after editing.
|
|
Use Edit Objects > Apply Closest Join to join selected objects at the closest point. Re-apply closest join after editing. |
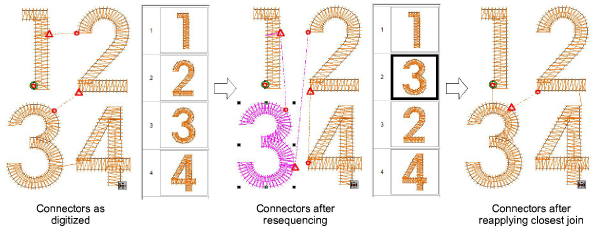
When you are digitizing closed objects, the Closest Join method automatically calculates the closest join between them, saving you having to think about entry and exit points. The Apply Closest Join feature allows you to (re-)apply closest join to selected objects after editing. The image below shows a) joins as digitized, b) joins after resequencing, c) joins after reapplying closest join. The Apply Closest Join command is only enabled when two or more embroidery objects are selected. It is also available from the Edit menu or by pressing J.
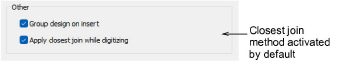
By default, the Closest Join method automatically calculates closest join between objects while digitizing. When deactivated, entry and exit points of all newly digitized objects are set manually. If you want to deactivate it for this purpose, choose Embroidery Settings from the Software Settings menu and deactivate the option on the Design tab.
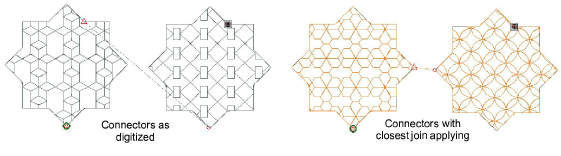
When deactivated, all newly digitized objects are joined by the As Digitized method. As shown in the first example below.
This means that you manually specify entry and exit points while digitizing. Generally it’s good to check entry and exit points before stitching out.
Tip: The Closest Join technique is not as powerful as Branching for run objects. The best it can do is swap the ends of the runs whereas Branching produces a nicely-merged double-run joined in the middle. See also Branching.
Add-ons
Get started & learn faster with...