Use Appliqué > Advanced Appliqué to generate open-object appliqué from one or more source objects.
|
|
Use Appliqué > Advanced Appliqué to generate open-object appliqué from one or more source objects. |
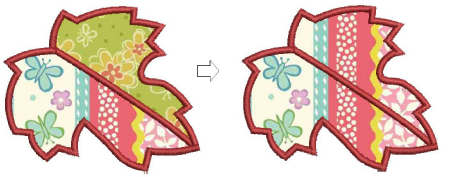
In the sample below, there may be one or two fabric areas. If there are two patches, the stem, as well as the outline, must have placement and tacking stitches. If there is only one patch, the stem will not require placement or tacking stitches. In this case, the two fabric areas need to be merged into one.
1Click the open-appliqué object, then the Advanced Appliqué tool. the Advanced Appliqué dialog opens.

2Select the Merge option. This panel is displayed.
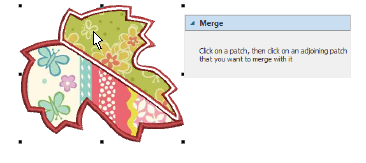
3Select the patch to merge. A red line appears around its border.
4Hover the cursor over the second patch. This patch may or may not be filled with fabric or color. A white line appears around its border.
5Click the patch. The two patches are merged into a single patch taking the fabric or color of the first one.
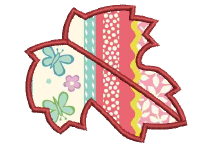
Note: All secondary stitching is removed from the boundary segments previously shared by the patches.
1To unmerge a merged patch, click the Unmerge option and click the merged patch.
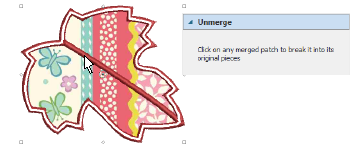
The merged patch is broken into its original patches, each with their current fabric or color. New secondary objects are created for shared boundaries.
2Re-assign fabrics or colors to the unmerged patches.
3Click Close to complete.
Add-ons
Get started & learn faster with...