
Use Object Properties > Outline > Satin to create thicker borders or columns of even thickness.

Use Object Properties > Outline > Raised Satin to create raised satin borders – can be used with trapunto for quilting effects.
Use Satin line to create thicker borders. Use Raised Satin line to create raised embroidery designs consisting of multiple layers of satin stitching. Stitch spacing and width can be adjusted before or after digitizing via Object Properties.

|
|
Use Edit Objects / Select > Reshape to reshape an object outline, edit stitch angles, or adjust entry and exit points. |
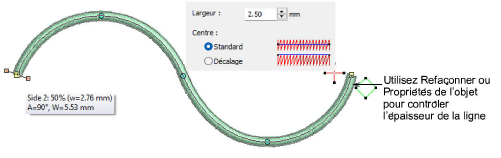
Satin line width can be controlled either by means of the Width setting in Object Properties, or interactively, using the Reshape tool and dragging the sizing handles. When you drag them, a prompt appears indicating the line width, as shown below. Use the Offset setting if you want your satin line to overlap the boundary of the shape. This will stop gaps from appearing when using satin line as a border adjoining another object.
Stitch spacing is the distance in millimeters between two needle penetrations on the same side of a shape. Where it is very narrow, stitches need to be less dense because too many needle penetrations can damage the fabric.
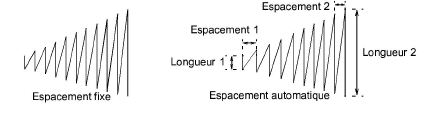
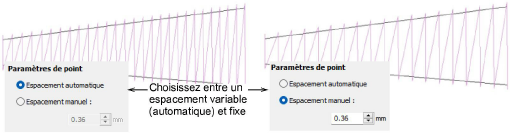
Where a border narrows, stitches are tight, thus requiring fewer stitches to cover the fabric. The Automatic setting adjusts stitch spacing for satin stitches according to outline width. For objects of varying width, Automatic adjusts spacing accordingly. Manual spacing allows you to set a fixed spacing of greater or lesser density.
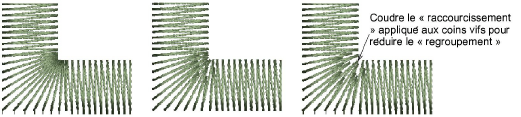
Stitch shortening is automatically applied to sharp corners to decrease density on the inside edge...
Modules complémentaires
Commencez et apprenez plus vite avec...


