
Use Edit Objects > Remove Overlaps to remove stitches that are covered by the selected objects. Overlap value can be changed in the Overlap tab of Embroidery Settings dialog.
|
|
Use Edit Objects > Remove Overlaps to remove stitches that are covered by the selected objects. Overlap value can be changed in the Overlap tab of Embroidery Settings dialog. |
Use the Remove Overlaps tool to remove underlying layers of stitching in overlapping objects. This helps to reduce the stitch count and prevent a build-up of stitches where they are not needed.
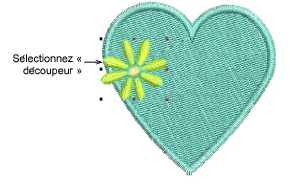
1Select one or more ‘cutters’.
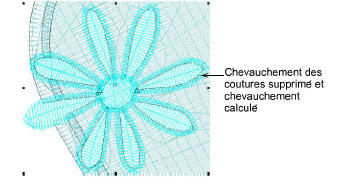
2Click the Remove Overlaps tool. The stitching overlap is removed. A margin of overlap is automatically calculated between cutter and underlying object/s in order to avoid unsightly gaps.
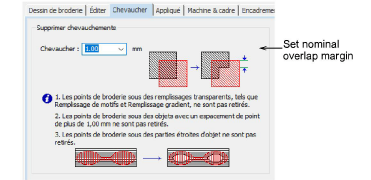
3Note that you can control the overlap margin via the Embroidery Settings > Overlap tab which can be accessed via the Software Settings menu. Softer fabrics may require more overlap to prevent gaps from forming.
Tip: You can use an entire design as a cutter excluding objects, such as borders or details, less than a certain width.
Modules complémentaires
Commencez et apprenez plus vite avec...


