
Use Digitize > Digitize Closed Shape to create closed shapes using either outline or fill stitching. Left-click for corner points, right-click for curves.

Use Context > Create Motif to create a custom motif pattern for future use.
The Create Motif function lets you save your own motif shapes for future use. Create your own ‘motif sets’ to organize and classify your motifs. Voir également Motif stamps.
1Select the object you want to use as a motif.
2Select Create Motif from the Context toolbar.
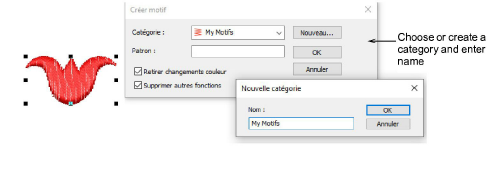
3Select a category from the droplist and enter a name in the Pattern field. Optionally, click New to create a new category.
Note: Custom motifs can only be saved to custom categories, not those installed with Hatch Embroidery.
4If you want to preserve machine functions such as color changes, leave the Remove Functions checkbox unticked. Otherwise, to remove unwanted machine functions, tick the checkbox.
5Click OK.
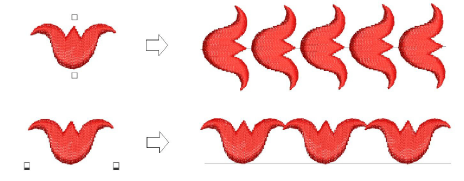
6Click to mark two reference points. These determine default motif orientation in motif runs and fills. Reference point 1 becomes the anchor point in the final motif. Reference point 2 becomes the rotation point.

7Reference points also determine the spacing between motifs.
8Click OK. The motif is ready to use and will appear in the Pattern Gallery.
Modules complémentaires
Commencez et apprenez plus vite avec...


