
Use Output Design / Standard > Print Preview to preview design worksheet. Print from preview window.
|
|
Use Output Design / Standard > Print Preview to preview design worksheet. Print from preview window. |
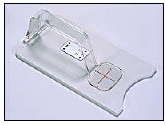 You can sew embroidery out by sending the design directly to a sewing machine or saving it to removable media and stitching out using a layout template and the cloth setter. The device has a transparent plastic bar with marked cross.
Hatch Embroidery allows you to define layout work areas of up to 3m x 3m. Large layouts may print to many pages. To save paper, you may choose to print at a percentage of actual size. You must then remember to multiply the template dimensions by a scale factor. For example, if you print at 50%, you need to double the measurements on the worksheet when transferring to the fabric. Use the table below as a guide.
|
% |
Scale |
Factor |
|
50% |
2:1 |
x 2 |
|
25% |
4:1 |
x 4 |
|
20% |
5:1 |
x 5 |
|
10% |
10:1 |
x 10 |
1Click the Print Preview icon. Your design layout displays as it will be printed.
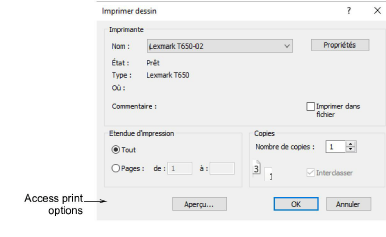
2Click Options. The Print Options dialog opens.
3Select Template Mode. These settings show the design outline with no stitches.
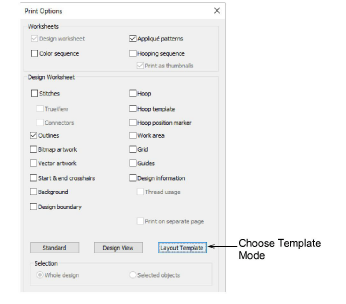
4Make sure Cloth Setter Marking and Work Area options are checked. The cloth setter marking indicates the hooping center. It is printed with each hooping in the design.
5Select the Zoom 1:1 option in the Zoom group.
6Click OK. Each hooping has a number printed near the cloth setter mark to indicate the hoop sequence.
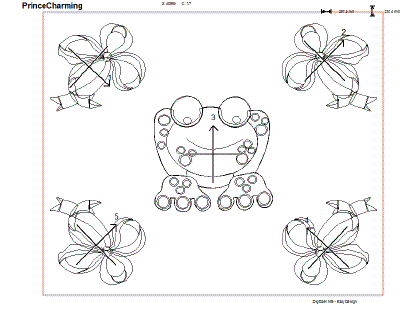
7You can print out an overview of the layout by selecting Zoom to Fit or entering a value in the % of Actual field.
Note: While the cloth setting marking is supported in JEF and SEW files, outlines are not. Since JEF and SEW are machine file formats, they only contain stitch data, no outlines. The workaround is to display JEF and SEW files with stitches and cloth setter marking turned on.
Modules complémentaires
Commencez et apprenez plus vite avec...


