Define work area

DefineWorkArea.png 

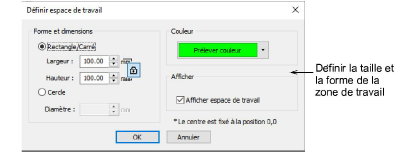
Use Create Layouts > Define Work Area to define the shape, size, color and view of the work area.

InsertDesign.png 

Use Customize Design / Standard / Create Layouts > Insert Design to insert an existing embroidery design into the current design. This tool is also available via File menu.

AutoCentreToWorkArea.png 

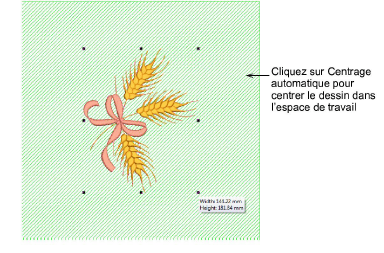
Use Create Layouts > Auto Center to Work Area to automatically move selected object/s to center of the work area (0,0).

Before you can create a design layout, you first need to define a work area corresponding to the item or fabric you intend to sew on. Work areas can be defined as rectangular or circular spaces. Hatch Embroidery allows you to define a work area up to 3m x 3m.

To define a work area...

1Click the Define Work Area button to open the dialog.

DefineWorkArea00025.png


2Select a rectangular or circular work area and enter the dimensions.

3Set a background color for the layout matching the fabric you intend to use.

4Make sure Show Work Area is activated.

5Insert and size artwork or embroidery design as required.

WorkAreaInsertDesign.png


6With the design or artwork selected, click the Auto Center tool and press Enter to center it in the work area.