
Use Create Layouts > Create Outlines & Offsets to create outlines and offsets for selected embroidery object(s).
|
|
Use Create Layouts > Create Outlines & Offsets to create outlines and offsets for selected embroidery object(s). |
The Outlines & Offsets feature allows you to quickly create outline stitching around selected objects or entire designs with a variety of outline styles.
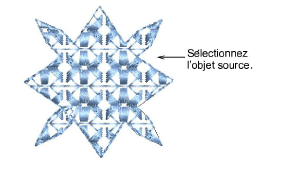
1Select the source object or objects.
2Click the Outlines & Offsets icon. The dialog opens. This dialog allows you to add outlines and offsets in a single process.
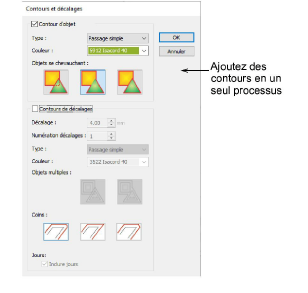
3Tick Object outlines.
4Choose your outline type. The Type droplist includes the full range – Single Run, Triple Run, etc.
5Choose your outline color. The Color droplist defaults to the current color in the design palette.
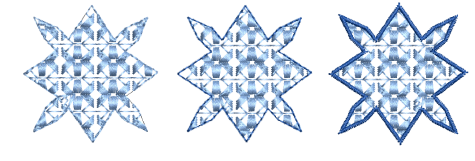
6Choose an overlap option:
|
Outline type |
Notes |
|
|
|
Individual |
All generated outlines are full outlines. |
|
|
Common |
Intersecting outlines are combined into a single outline. |
|
|
Trimmed |
Overlapped portions are trimmed by overlapping objects. |
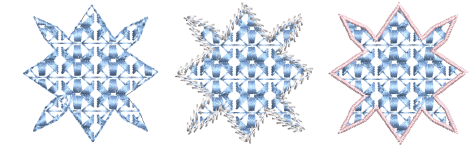
7Click OK to apply. Hatch Embroidery generates an outline around the source object/s and inserts them immediately afterwards in the stitching sequence.
8Generated outlines are independent objects and can be further modified as desired.
Modules complémentaires
Commencez et apprenez plus vite avec...


