
Use Context > Elastic Embossed Fill to create embossed fill patterns that follow the stitch angles and are scaled according to the object width. Right-click for settings.
|
|
Use Context > Elastic Embossed Fill to create embossed fill patterns that follow the stitch angles and are scaled according to the object width. Right-click for settings. |
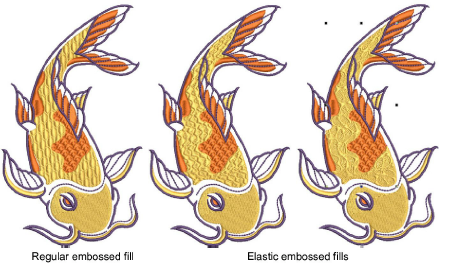
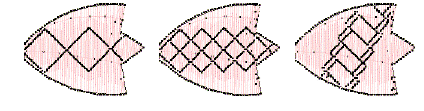
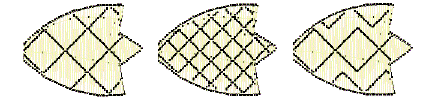
Elastic Embossed Fill is a decorative effect where the pattern follows the stitch angle and may be scaled to fit the width of the object. You can apply it to a variety of object and stitch types. It works best with satin stitching. It is intended for use with objects with turning stitches or varying column width. To apply the effect to new objects, select a digitizing tool and click the toggle on the Context toolbar. The effect will be applied to all newly digitized filled objects. It doesn’t apply to outline objects. Embossed fills turns with the shape unlike regular embossed fills...
Tip: If you are using satin stitch with Elastic Embossed Fill, turn off Auto Split. See also Satin stitch.
1Select an object and choose Elastic Embossed Fill from the Object Properties > Effects tab.
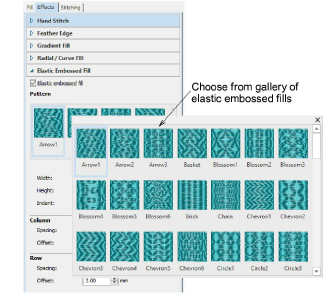
2Select a pattern from the Pattern Gallery. You have the same range of patterns as Embossed Fills. See also Embossed fills.
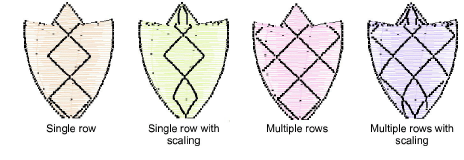
3Select one of four layout options:
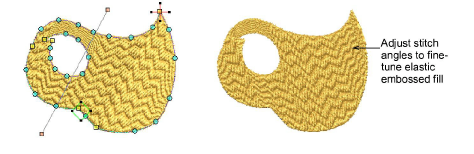
4Optionally, adjust or add stitch angles. Stitch angles have a strong bearing on the orientation of the pattern.
5Optionally, adjust Elastic Embossed Fill settings to vary size, shape indent, spacing and pattern offsets. See also Embossed fills.
6In the Width and Height fields, adjust the dimensions of the largest pattern in the effect.
7In the Indent field, adjust the distance between the first pattern and the first stitch line.
8In the Column panel, enter spacing and offset settings as preferred.
9If you selected an option that uses more than one row of patterns, the fields in the Row panel are available.
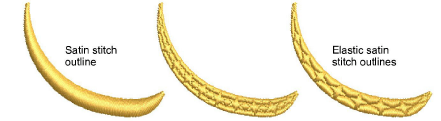
Note: Embossed Satin adapts to the shape and is scaled accordingly.
Add-ons
Get started & learn faster with...


