
Click View > Show Grid to show or hide grid. Right-click for settings.

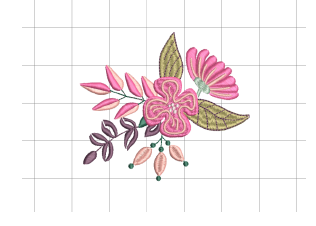
Click View > Show Hoop Template to show or hide hoop template.
|
|
Click View > Show Grid to show or hide grid. Right-click for settings. |
|
|
Click View > Show Hoop Template to show or hide hoop template. |
Templates for all hoops are included in Hatch Embroidery. They can be used for positioning in place of the design grid. Alternatively, use grid lines to help accurately align or size embroidery objects. Grid and hoop template are mutually exclusive.
Adjust the background as preferred.
Click the Show Hoop Template icon to toggle hoop template display on or off.
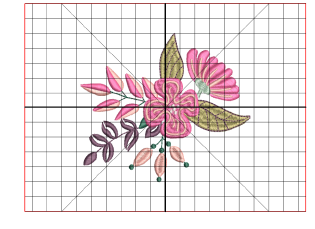
Click the Show Grid icon to toggle grid display on or off.
Right-click the Show grid icon to access grid settings. Optionally, adjust grid spacing and turn on Snap to grid.
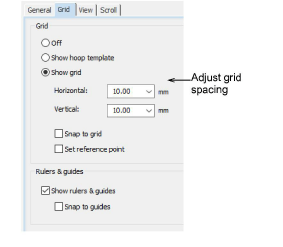
You can adjust grid spacing in both horizontal and vertical directions. Sometimes you might want to set it for precise design work such as cross stitch.
Optionally, activate Snap to grid and Snap to guides. Reference points, control points or leading edges of objects ‘snap’ to grid lines during digitizing, sizing, reshaping, or positioning operations.
Select the Set reference point checkbox to set the zero point of the rule. For example, you can set the grid reference point to the design center. This is easier and faster than moving the whole design. When you close the dialog, you are prompted to mark the zero point of your design.
Tip: To temporarily disable Snap to grid as you work, hold down the Alt key.
Add-ons
Get started & learn faster with...


