
Double-click to start EmbroideryHub.
|
|
Double-click to start EmbroideryHub. |
From EmbroideryHub, you can view designs sent to a particular device as well as create folders. You can also rename or delete designs.
Note: When renaming files, take care not to change the extension – e.g. ‘JEF’, ‘EXP’ – as the file may become unusable.
1Open EmbroideryHub.
2Select the EmbroideryConnect device icon and click Manage Designs in Selected at the top of the main window.
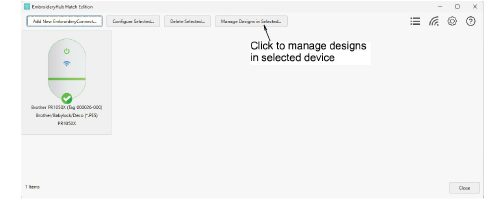
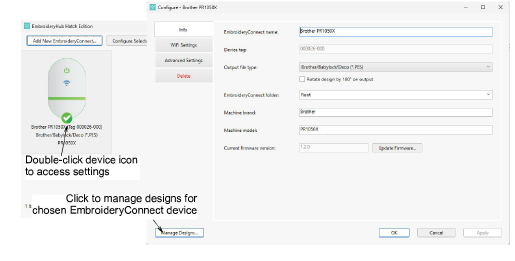
Alternatively, double-click the EmbroideryConnect icon to access settings and then click the Manage Designs button at the bottom of the dialog.
3A list of designs sent to machine is displayed. Here you can create new folders, and rename or delete designs as required.
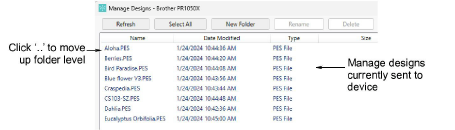
Tip: If you have created a folder structure, double-click the ‘..’ at the top of the list to move up a folder level.
Caution: When naming folders or files, special characters such as German umlauts – ‘ä’, ‘ö’, ‘ü’ – can cause problems. Avoid creating folders or copying files to the EmbroideryConnect device directly via Windows Explorer. Folders are best created from within the Manage Designs dialog.
Add-ons
Get started & learn faster with...


