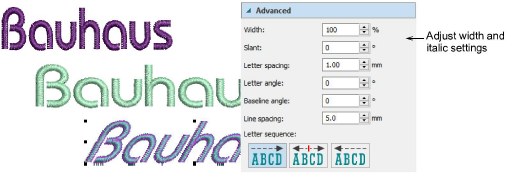
Adjust lettering Width and Italic settings in the Advanced panel. See also Reshape lettering.
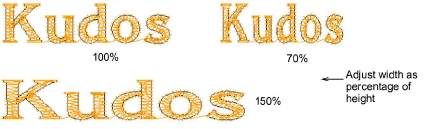
Change the appearance of a font by changing the letter width in proportion to height. The default Width value is 100%.
You can slant letters to the left or right for an italic effect. The default slant angle is 0° which is equivalent to no italics.

Letter spacing is calculated automatically as a percentage of letter height. Script fonts default to zero or 1mm spacing depending on font style. In most cases the default spacing is adequate. Sometimes, however, you may want to change it for effect or to fit within a fixed baseline.

You can control the angle of letters and lettering baselines via the Letter angle and Baseline angle settings. Use both negative and positive values to control direction.
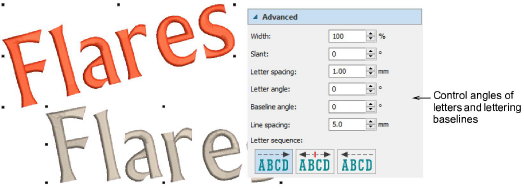
Adjust Line spacing value to fine-tune the space between lines of text.
Hatch Embroidery allows you to specify the sequence in which letters are stitched to minimize registration problems with caps or difficult fabrics. Stitch the lettering from left or right, or from center out. This is especially useful when stitching on caps. To change letter sequencing, double-click a lettering object. Select a letter stitching sequence in the Advanced panel. Options include:
|
|
Left-to-right |
When selected, lettering is stitched from left to right (the default). |
|
|
Center-out |
When selected, letters to the left of center are stitched first, going from right to left. Next letters to the right of center are stitched, going from left to right. |
|
|
Right-to-left |
Lettering is stitched from right to left. |
Tip: Travel through your design to check the stitching sequence. See also View stitching sequence.
Add-ons
Get started & learn faster with...


