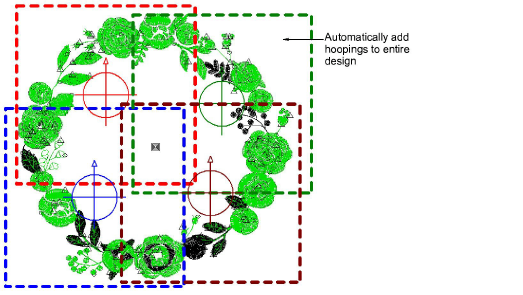
The easiest way to work out multiple hoop positions is with the Automatically Add Hoops tool. These are calculated according to the object sequence. Bear in mind that this method uses a ‘one-size-fits-all’ software algorithm.
It's always a good idea to reduce the number of potential color changes in a design before creating automatic hoopings.
You can activate color optimization via the Embroidery Settings > Multi-Hooping tab.
The software attempts to include whole objects within sequential hoopings. Where this is not possible, it will split them between hoopings.
Moving a hoop slightly to cover an excluded object may reduce repeat hoopings. Alternatively, try adjusting the stitching sequence.
Each hoop position is stitched out sequentially to form the whole design.
The same hoop position may be repeated, depending on the object sequence.
Add-ons
Get started & learn faster with...


