
Use Edit Objects > Stitch Edit to place stitch cursor at selected insertion point.
|
|
Use Edit Objects > Stitch Edit to place stitch cursor at selected insertion point. |
The Stitch Edit feature lets you select single stitches, several stitches, or a range of stitches by selecting their needle points. You can move individual or groups of selected stitches. As always, if an object’s stitches are regenerated for any reason, all stitch editing functions are lost.
Tip: In addition to background color or fabric, display colors for stitches, needle points, object shapes, and grid are part of the colorway definition. Change them if the default display color is not visible against the current colorway. See Adjust display colors for details.
1Zoom in and display the needle points for easier selection.
2Select the object and click Stitch Edit.
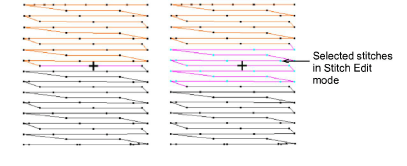
3Select individual stitches in Stitch Edit mode by selecting their needle points.
The needle point and stitch colors change and the needle position marker moves to the selected stitch.
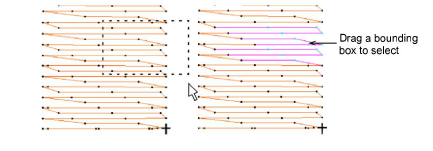
4To select multiple stitches...
Drag a bounding box around needle points.
Hold down the Shift key and click to select a range of stitches
Hold down the Ctrl key and click to select multiple stitches.
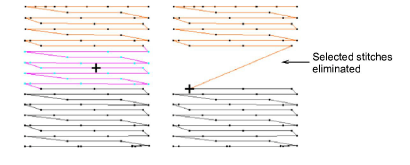
Press Delete to eliminate unwanted stitches.
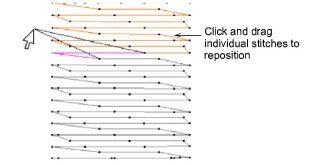
Move selected stitches by dragging one of the selected needle points. The ‘ghost line’ shows the new position.
Press Enter to confirm.
Add-ons
Get started & learn faster with...


