
Use Customize Design > Auto Fabric to change the properties of the design for stitching on a different fabric.
|
|
Use Customize Design > Auto Fabric to change the properties of the design for stitching on a different fabric. |
Templates are essentially design files but use the extension JMT. When you close a design, current settings are not automatically saved to the current template. You can save modified settings to the default template though you should consider saving them to a separate template.
1Start a new design file or open an existing one.
2Optionally, turn off auto fabrics if you need access to all object properties.
3Adjust property settings, backgrounds, start/end points, effects, etc, as required.
4Add any objects and/or lettering to be included in the template. For instance, you may want to include sample lettering using different baselines. When using the template, simply over-type the sample text.
5Select File > Save as Template. The Save as Template dialog opens onto the TEMPLATE folder. This is located within the Hatch Embroidery installation folder. Templates must be saved here or they will not appear in the template list when you start a new design from template. By default, the file type will default to the Hatch Template (JMT) format.
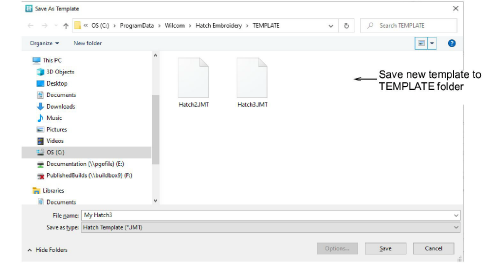
6Enter a meaningful name for your template, and click Save. The template is ready for use and will appear in the New from template droplist.
Caution: When saving to a new blank template, make sure there is no design currently open in the file. If there is, it will appear when you next open ‘new from template’.
Add-ons
Get started & learn faster with...


