
Use Artwork > Prepare Artwork for Embroidery to prepare selected bitmap artwork for automatic digitizing.
|
|
Use Artwork > Prepare Artwork for Embroidery to prepare selected bitmap artwork for automatic digitizing. |
Use the Prepare Artwork for Embroidery tool to prepare images for automatic digitizing. This function automatically flattens colors, sharpens outlines, and reduces noise. Areas enclosed by a defined outline are reduced to a single color.
1Scan or import the image to use. See also Supported artwork.
2Unless you have already done so, use the Context toolbar to size your artwork to its intended dimensions.

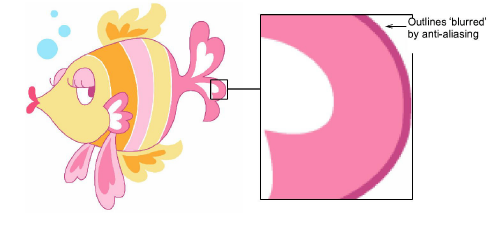
3Depending on the source, you may find dithering, anti-aliasing, or other sources of ‘noise’ in the image. If the image contains outlines, these will generally be ‘blurred’ by anti-aliasing.
4Select the image and click the Prepare Artwork for Embroidery icon. The image appears in both ‘before’ and ‘after’ preview panels.
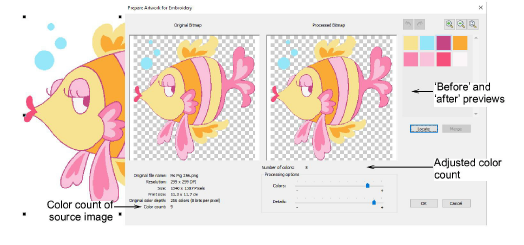
5Check the number of colors in the processed bitmap. Hatch Embroidery suggests a color count and shows a preview of the resulting image. If there appear to be too many, the image probably contains noise.
6Use the scroll button on your mouse to zoom in and inspect details.

7Adjust the overall color count as necessary:
If there appear to be too many colors to render the design as threads, use the Colors slider to decrease color count.
If there appear to be too few colors to provide all the detail you want, use the Details slider to increase color count.
8Manually locate and merge like-colors as necessary:
Holding the Ctrl key, click like-colors to select.
Click and hold Locate to preview.
Click Merge to merge like-colors into a single color.

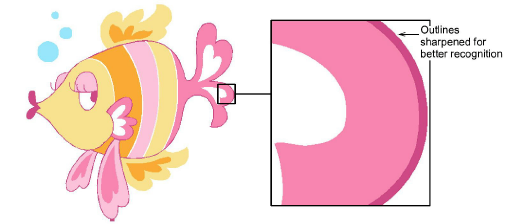
9Click OK to process the image. Image colors should be reduced as per the preview. The artwork can now be auto-digitized. See Auto-digitize artwork for details.
Add-ons
Get started & learn faster with...


