Create laydown fills manually
As an alternative to the Laydown Stitch tool, use manual digitizing techniques to create shapes and fill them with the Laydown Stitch type available from the Fill tab of the Object Properties docker.
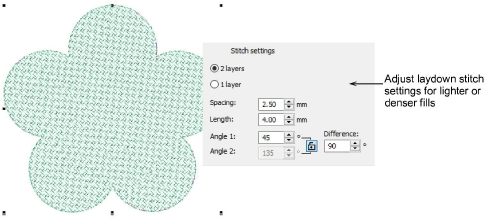
Stitch settings
Object properties are the same as stitch settings available in the Laydown Stitch dialog. Adjust density for lighter or heavier naps. In two-layer fills, default stitch angles are set at 90° (perpendicular) to each other. Adjust as preferred.
Other settings
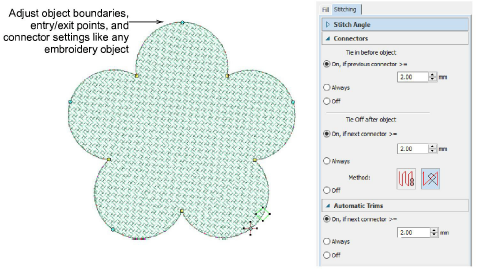
Any laydown stitch object will have Connector, Automatic Trim and Auto Jump settings available in the Object Properties > Stitching tab. In Reshape mode, you can adjust object boundaries as well as entry and exit points.
Note: The Stitch Angle setting under the Stitching tab has no effect on laydown stitching. Stitch angles are controlled via the Fill tab.