
Use Create Layouts > Insert Graphic Marker to insert a graphic marker representing adhesive stickers attached to the fabric to indicate location and orientation.
|
|
Use Create Layouts > Insert Graphic Marker to insert a graphic marker representing adhesive stickers attached to the fabric to indicate location and orientation. |
Graphic markers are image files and there is no stitching involved. They are used in printouts to help with your placement when sewing.
1Group the embroidery design if not already grouped.
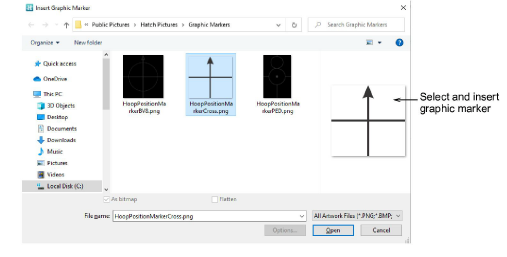
2Use the Insert Graphic Marker tool to insert markers as required. You’ll find a selection under the Hatch Pictures > Graphics Markers folder.
3Select both and align the centers.
4Group the graphic and the embroidery.
5Position and rotate as needed.
6Print the graphic with the design in Print Options.
7Print the layout template. Place a physical position marker at the same location and orientation as the basting stitch marker.
8Export the machine file.
9Move the start needle position to the center of the marker.
10Stitch out the design.
Add-ons
Get started & learn faster with...


