Add basting stitch
markers
Use basting stitch markers to help align
the fabric in the hoop for continuous embroidery, multi-piece layouts,
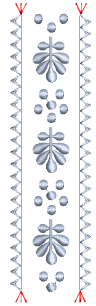
and precision placement. For vertical continuous embroidery, you need
to place one pair of markers at the top and bottom of the design.
Note: If you turn
on registration marks with multi-hooped designs, markers are automatically
generated. In cases where the multi-hooping function does not split the
design or where you don’t like the calculated multi-hooping results, you
may use manual basting stitch markers. You will need to handle splits
manually. See
Output multi-hooped designs for details.
To place basting stitch markers...
1Insert the design. Group if
not already grouped.
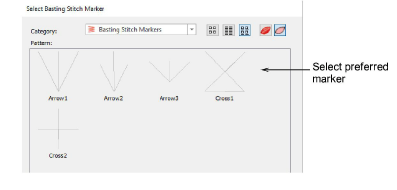
2Click the Basting
Stitch Marker tool to open the Select
Basting Stitch Marker dialog. Various sizes and shapes of
marker are available.
3Select a marker and
click OK.
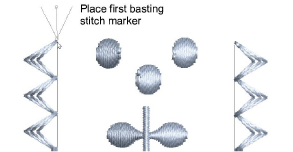
4Click a start point
at, say, the top left-hand corner, move the mouse to pivot the marker,
and click to place it.
Tip: For more
precise positioning, hold down Ctrl while dragging – movement
is constrained to X / Y axes.
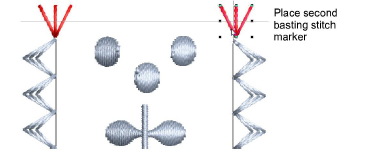
5Repeat to add a marker
at the other corner. Use the Mirror-Copy Horizontal tool
to precisely align the markers.
Tip: For more
accurate positioning, use the arrow keys to ‘nudge’ selected objects into
position.
6Press the Escape
key to deactivate the tool.
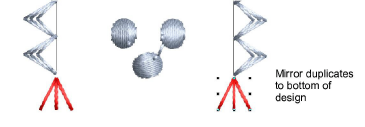
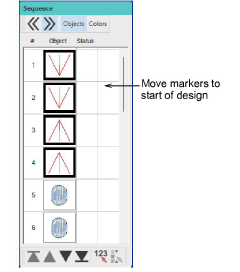
7Select the top markers
and using Mirror-Copy Vertical, duplicate
them and mirror the duplicates to the bottom of the design.
8Select both sets of
markers in the Sequence docker and
move them to the start of the design.
To use basting stitch markers...
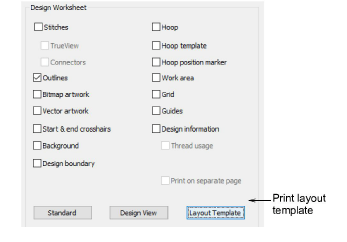
1Print the layout template.
2Place a physical position
marker at the same location and orientation as the basting stitch marker.
3Export the machine
file. Basting stitch markers will be stitched first.
4Move the start needle
position to the center of the marker.
5Start stitching the
basting stitch marker to confirm the location and orientation. Adjust
as needed.
6Stitch out the design.
Tips
Hoop, rulers and guides should
be visible when using this tool.
An unused color should be selected
before using the tool.
Turn off hoop automatic centering
when inserting markers. Turn on hoop automatic centering to check
the design is fully covered by the hoop.
With continuous embroidery, the
first two markers can be ignored in the first stitching. The last
two markers can be ignored in the last stitching.
In the case of borders, you need
all markers to stitch at the start of the design. Other designs may
need markers at the start and end.