Set frame-out position
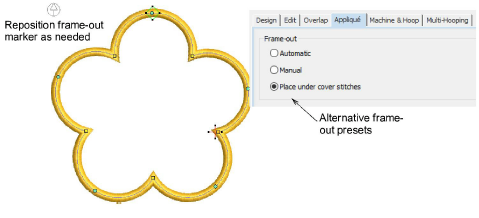
In Hatch Embroidery, the ‘frame-out’ is placed under appliqué cover stitches by default. You can select frame-out markers in Reshape mode and reposition as needed.
On some machines, wherever the frame (hoop) moves, the needle will form a tie-off. When it starts up again, it will add a tie-in. To avoid unwanted needle penetrations and ‘knots’ appearing in your fabric, various presets are available via Frame-out Options.
Use the ‘place under cover stitches’ option (the default) when you don’t want to move the needle at all. This conceals unwanted tie-ins and tie-offs. In addition to automatic frame-out, you have the option of setting it manually. If you choose Manual, you are prompted to digitize a frame-out after pressing Enter. This may be desirable where the hoop attaches to the machine.
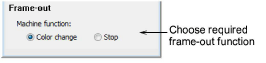
Depending on your machine type, specific functions may be needed to initialize the machine or trigger a frame-out. Frame-outs are specified as ‘Stop’ or ‘Color Change’ functions...
Tip: While Hatch Embroidery allows you to turn on or off trims and tie-offs, some machines will override this whenever they encounter a color change.
Related topics